
X.com
Store-bought Mother’s Day cards are everywhere right now. Aisles full of them. Sentimental poems, watercolor flowers, generic “you’re the best mom” messages printed in elegant fonts that mean absolutely nothing because they were written for every mom on earth simultaneously.
Your mom is not every mom on earth. She’s a specific person with specific obsessions, a very particular sense of humor, strong opinions about her favorite shows, and characters she talks about like personal friends. She deserves a card that reflects that.
Making a custom Mother’s Day card using pop culture stickers takes maybe twenty minutes, costs almost nothing, and produces something she’ll genuinely keep. Not out of obligation. Because it’s actually good and actually hers.
Here’s exactly how to do it.
What You’ll Need Before You Start
You don’t need art skills, craft supplies from a specialty store, or hours of free time. The materials list for a great sticker card is simple.
A blank card or cardstock: Most craft stores, dollar stores, and even grocery stores carry blank white or cream cards with envelopes. A folded piece of thick paper or cardstock works equally well if you have it at home. The surface needs to be smooth enough for stickers to adhere cleanly.
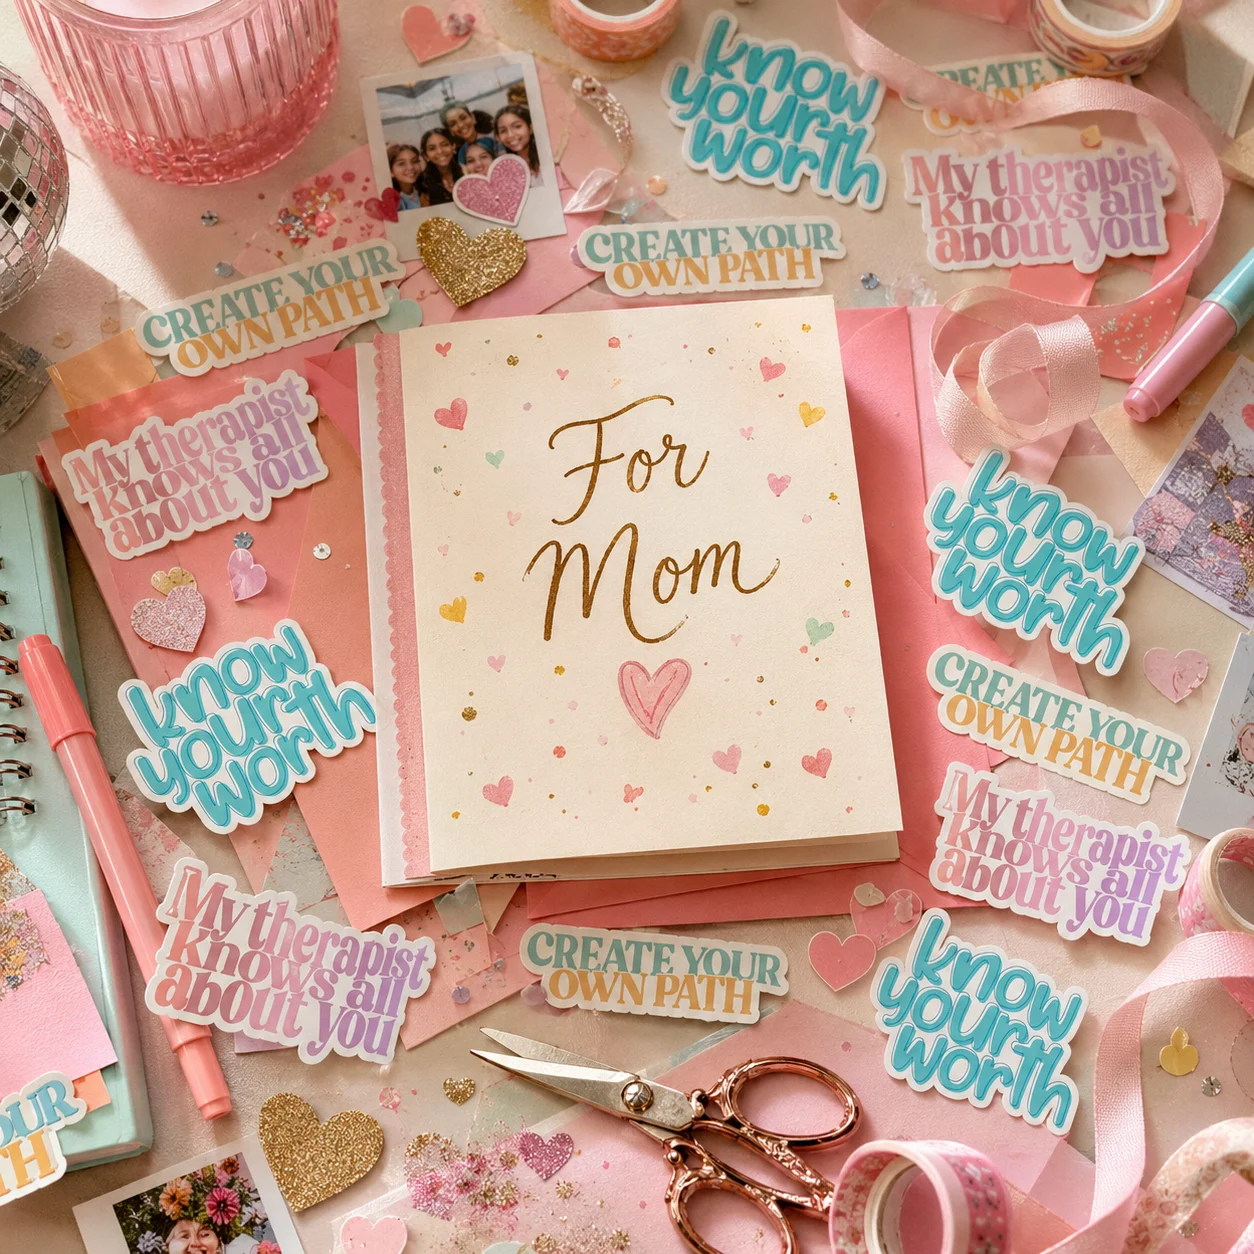
Pop culture stickers that reflect her specific tastes: This is the most important part of the whole project. Choose stickers from shows she watches, movies she quotes, characters she loves, or memes she sends in family group chats. The more specific the reference, the better the card will land.
A pen for your written message: Fine-tip markers or quality pens look better than ballpoint on card paper but use whatever you have.
Optional extras: Washi tape for borders, a ruler if you want clean lines, additional small decorative stickers if you want to fill in space, and an envelope if your card doesn’t come with one.
That’s genuinely everything. This is a low-effort, high-impact project.
Step One: Choose the Right Stickers for Her
Before you touch the card, spend time choosing stickers that actually mean something to your specific mom.
Think about what she quotes constantly. Think about the show she’s rewatching for the third time right now. Think about the movie she made you watch as a kid that turned out to be genuinely great. Think about the characters she’s mentioned caring about way more than she probably admits. Think about the memes she sends and the specific corner of pop culture she calls home.
The sticker choices are the entire emotional core of this card. Getting them right means the card feels like you made it for her specifically. Getting them wrong, or choosing generic stickers with no personal connection, means it just looks like a craft project.
Some examples to get you thinking. If she’s devoted to a specific crime drama she discusses; like it’s real life, find character stickers or quote stickers from that show. If she’s been quoting the same comedy film for twenty years, find stickers from that movie. If her entire texting personality is built around a specific set of memes, those memes in sticker form on her card will make her laugh immediately.
Choose two to five stickers for the card front depending on size. You want the front to feel curated and intentional, not covered in so many stickers that nothing stands out.
Step Two: Plan the Layout Before Peeling Anything
This step saves you from a lot of regret.
Before removing any sticker backing, lay your stickers on top of the closed card and move them around until the arrangement feels right. You’re looking for balance, a layout where the stickers feel intentional and complement each other rather than just sitting randomly on the surface.
A few layout approaches that work well for Mother’s Day cards.
The anchor approach: Choose your most meaningful or visually strongest sticker and place it slightly off-center as the focal point. Arrange smaller stickers around it to support rather than compete. This creates a clear visual hierarchy where one sticker does the emotional work and the others add context.
The corner cluster: Group two or three stickers in one corner of the card, leaving the rest of the front clean and open. This gives the stickers room to breathe and creates a more sophisticated look than covering the entire surface.
The scattered arrangement: Place stickers at different angles across the card front with deliberate spacing between them. This works well when all your chosen stickers are roughly the same size and equally meaningful.
The border approach: Use smaller stickers to create a loose frame around the edges of the card front, with the center left open for a short-written message or a larger statement sticker.
Once you’ve found an arrangement you like, take a quick photo so you remember the positions before you start peeling.
Read More: Fun Ways to Use Pop Culture Stickers at Home This Mother’s Day
Step Three: Apply the Stickers Carefully
Now you peel and place. Go one sticker at a time rather than peeling them all at once.
Start with your most important sticker first. This is usually the largest one or the one that anchors the whole layout. Peel the backing slowly and position it carefully on the card. Press firmly from the center outward to avoid bubbles and ensure good adhesion to the card surface.
Work through the remaining stickers in the order that makes sense for your layout. If stickers overlap by design, apply the bottom layer first and the top layer second.
Press each sticker down firmly along all edges after placing it. Card paper is slightly more textured than glass or plastic, so making sure the edges are fully adhered prevents them from lifting later.
If the sticker goes slightly wrong, peel it back slowly and carefully before repositioning. Most quality vinyl stickers can handle gentle repositioning on card paper without tearing.
Step back and look at the finished front from a short distance. Does it look the way you wanted? Is there anything that feels off? Make small adjustments now before moving on.
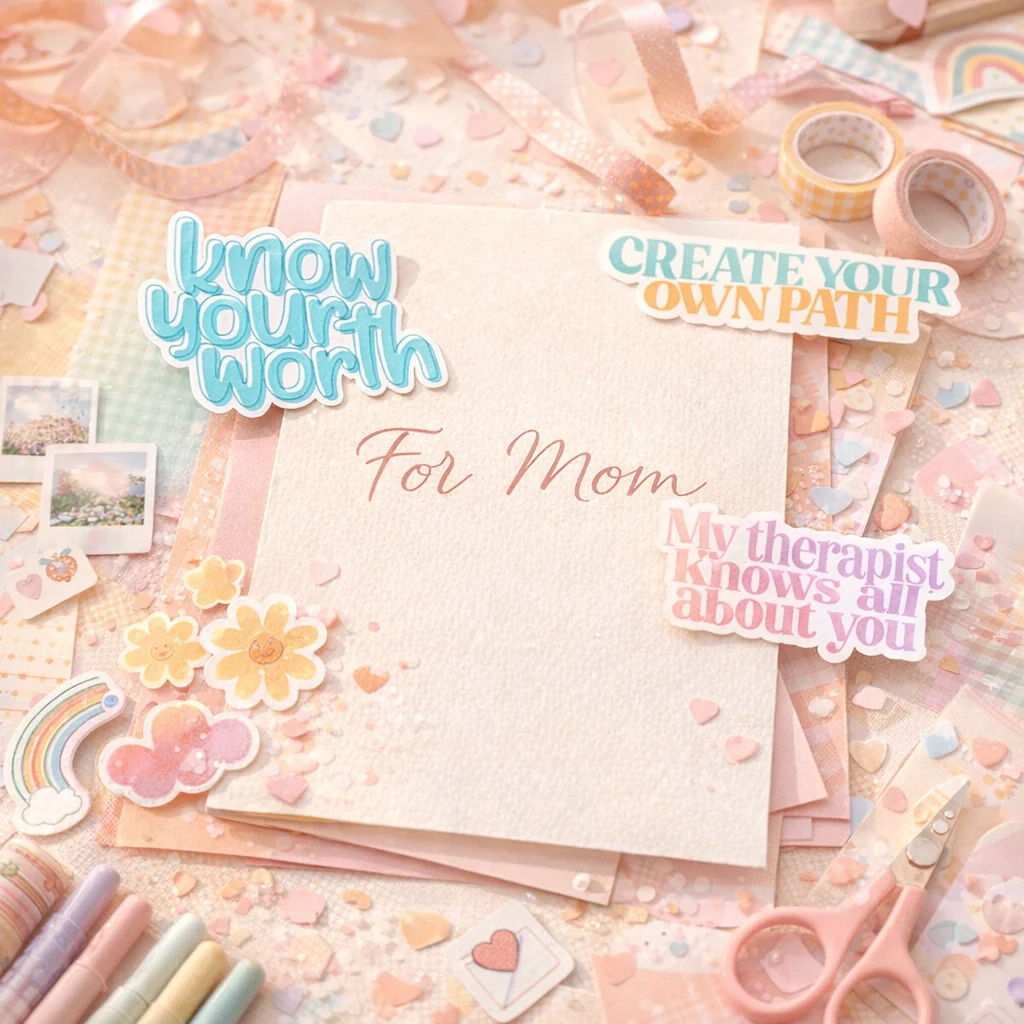
Step Four: Add a Written Touch to the Front
The stickers do visual work. A few words on the card front can tie everything together and make the connection explicit.
This doesn’t need to be long. Sometimes a single line in small, neat handwriting underneath or beside the stickers is enough. Something that connects the sticker to your message.
If you’ve put a sticker from her favorite show on the front, write the character’s name or a line from the show she’d immediately recognize. If you’ve used a meme sticker, write one word underneath that completes the joke. If you’ve used a character she’s always identified with, write a short line about why that character made you think of her.
This optional written element on the front transforms the sticker arrangement from decoration into communication. It shows that you didn’t just put stickers on a card. You made choices with specific reasons, and you wanted her to know those reasons.
Keep it small so it doesn’t compete visually with the stickers. A fine-tip pen in black or a color that complements the sticker palette works best.
Read More: Creative Ways to Wrap Mother’s Day Gifts Using Stickers
Step Five: Write Your Message Inside
The inside of the card is where you say the real thing.
Don’t write what every Mother’s Day card already says. Write something that connects specifically to the stickers on the front and to your actual relationship with your mom.
Start by referencing the pop culture connection if it feels natural. “I found this sticker and immediately thought of you because you’ve quoted this show in every single-family dinner for the past three years and honestly, I respect it.” That’s a real message. That’s the kind of sentence she reads and feels genuinely seen by.
Then say the actual thing you want to say. Tell her something specific about what she’s meant to you, something you notice about her that she might not realize you’ve noticed, something she’s done or said that actually mattered. These specific things hit harder than general affections because they require you to have been paying attention.
Keep the handwriting as neat as you can manage. Take your time with this part. The inside message is the heart of the whole card and rushing it undermines everything the stickers set up.
Sign it however you actually sign things with her. The level of formality or affection should match your real relationship, not what seems appropriate for a Mother’s Day card.
Step Six: Add Finishing Details If You Want Them
Once the card is complete, look at it and decide if it needs anything else.
If there are areas of white space that feel too empty, a small accent sticker or two can fill them without overwhelming the layout. Tiny stars, small symbols, or minimal decorative elements work well as filler without distracting from your main stickers.
Washi tape along the inside fold or around the envelope adds a polished touch that makes the whole thing feel more finished. This is completely optional but takes about thirty seconds and makes a visible difference in presentation.
If you’re including the card with a physical gift, consider using a coordinating sticker from the same pop culture world to seal the envelope. It’s a small detail that shows the thought extended beyond just the card itself.
Why This Works Better Than Any Store-Bought Card
Store-bought cards are written for nobody specifically and therefore resonate with nobody deeply. They say the expected things in the expected ways, and they get the expected response.
Your handmade pop culture sticker card says something only possible because you made it for her specifically. The stickers you chose exist on that card because of who she is. The message inside exists because of your actual relationship. There is no version of this card that works for any other mom on earth.
That specificity is what makes people keep cards. Not because they feel obligated to but because the card is genuinely about them, their personality, their passions, their specific place in the life of the person who made it.
She will keep this card. She will probably show it to someone. She will definitely remember it.
Conclusion
A custom Mother’s Day card made with pop culture stickers is one of the most personal things you can do for someone you actually know well. It takes almost no time, costs very little, and communicates exactly the kind of genuine attention that makes gifts feel meaningful rather than transactional.
Choose stickers that reflect her real obsessions. Plan your layout before committing. Write something specific and true inside. The rest takes care of itself.
At Seriously Dorky, we have the pop culture stickers that belong on your mom’s card. The characters she loves, the quotes she uses daily, the memes she sends at completely inappropriate hours. Find the ones that are made for her specifically and make her a card she’ll actually keep this Mother’s Day.

7 Ways to Boost Your Holiday Branding with Stickers
The holiday season is basically the...
The Ultimate Guide to Choosing the Right Material for Your Stickers
You’re scrolling through dozens...
Fun Ways to Use Pop Culture Stickers at Home This Mother’s Day
Mother’s Day is coming and you...


